Wednesday, March 20, 2013

Handmade, Personalized baby gifts and keepsakes just for you

Follow Me on Pinterest


Handmade and personalized baby gifts and keepsakes

My world is beginning to revolve around Carlee Jane.  Isn’t amazing how something so tiny and so innocent can captivate you?  I know this baby stage won’t last long so I’ve decided to capture it for a moment and create a few keepsakes to remember when she was born.

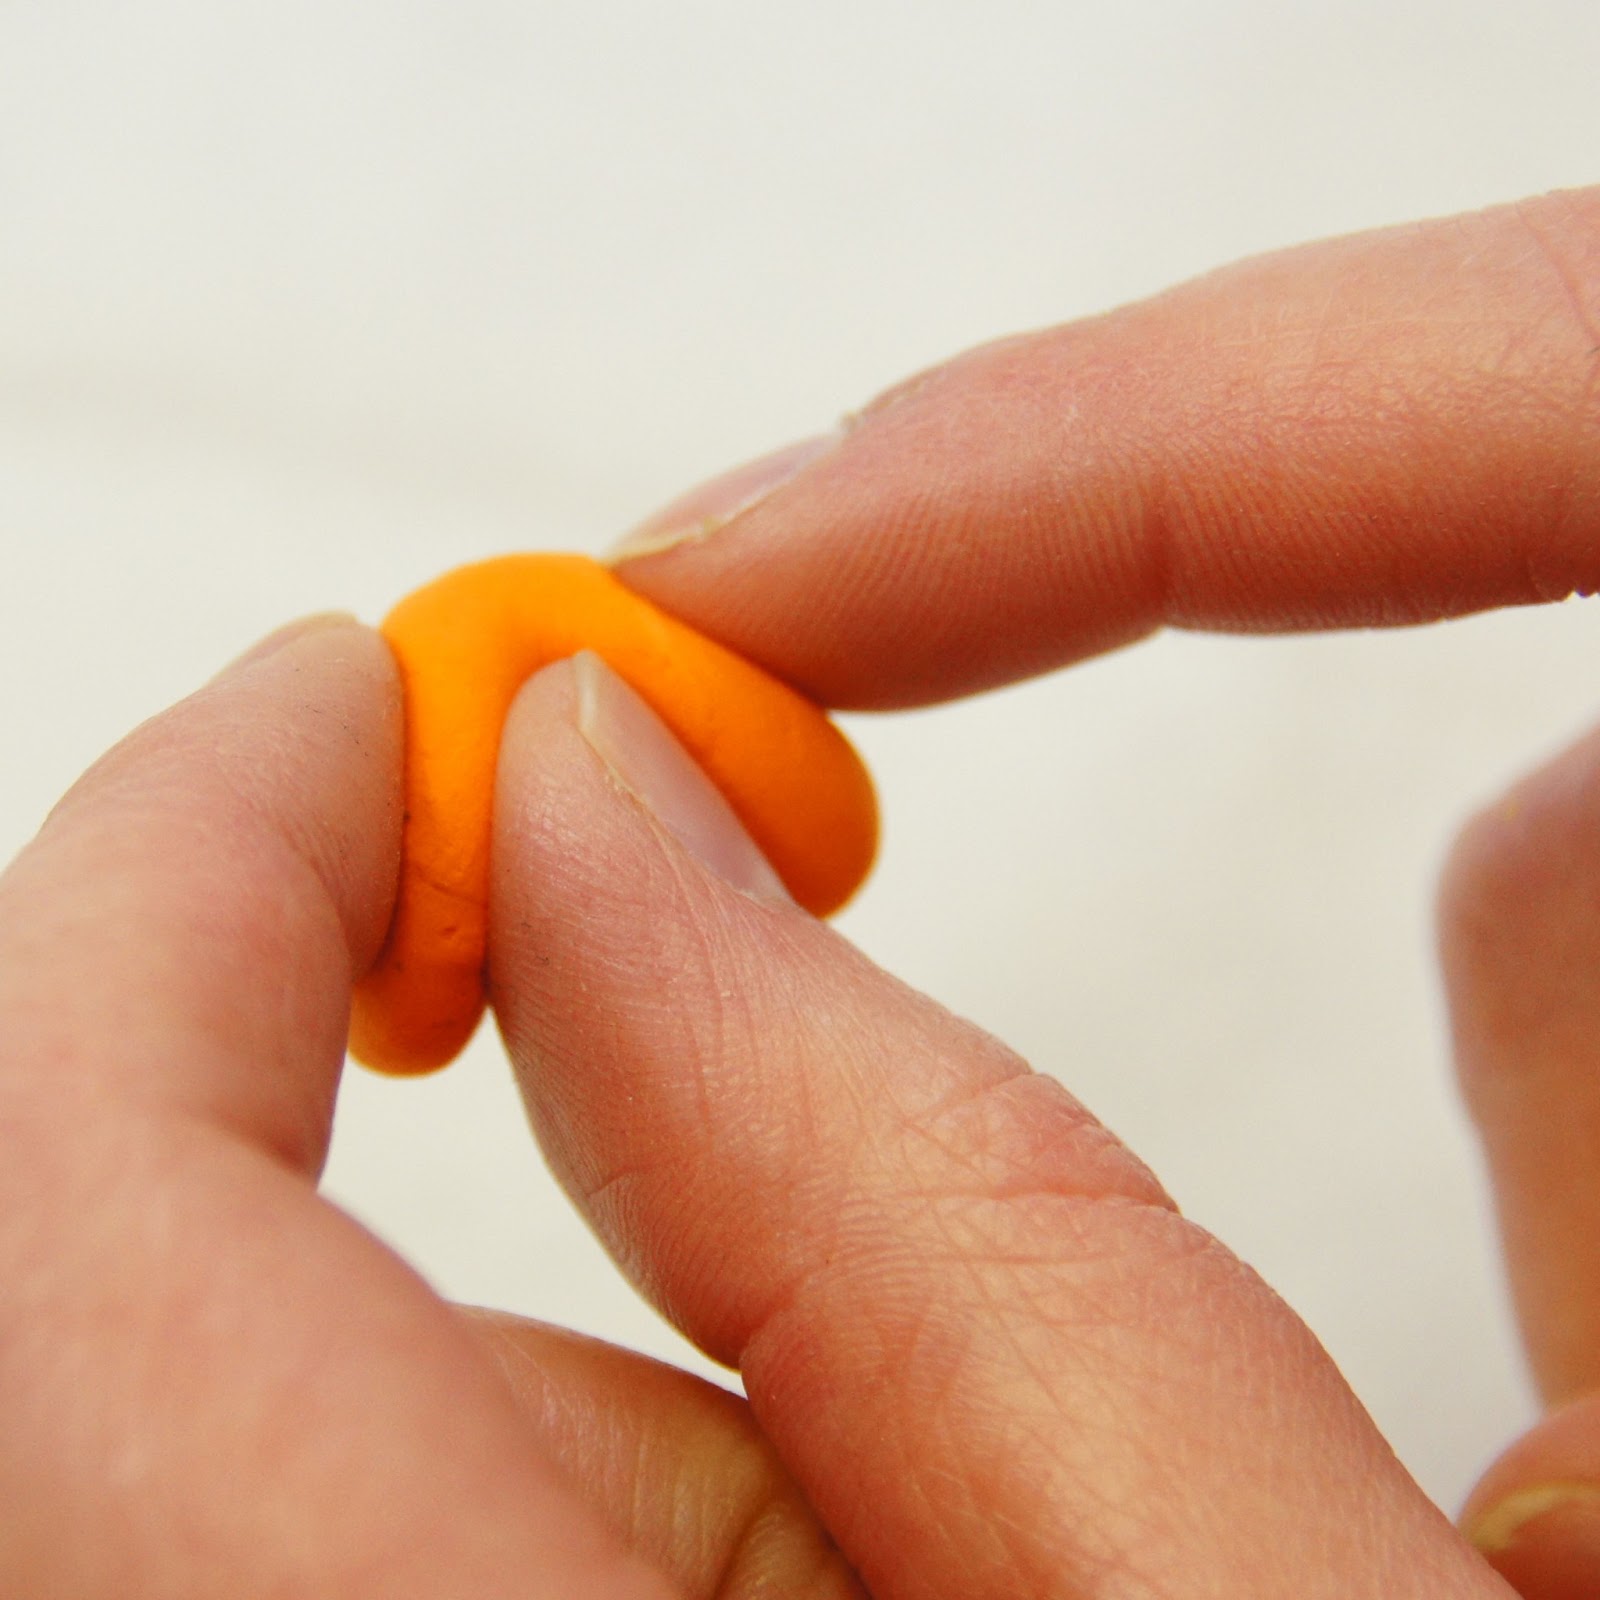
I began my polymer clay journey 21 years ago when my babies were born.  I’ve always been drawn to baby animals and figurines because it seems that I could capture their baby-ness forever. And their just so darn cute and cuddly! Who can resist!?!?!


Over the years, I’ve made several personalized baby keepsakes for friends as gifts.  And recently, inspired by Carlee, I went back to my roots and created a few more characters in clay.

I like to give gifts that are truly unique and personal so, if you need a unique baby gift for a shower, new mom or parents to be, allow me to custom design a forever keepsake for you, customized to your colors and personalized with a photo, babies name or both.  It would be my pleasure

Consider having a personalized baby cake topper created and then keep it as a keepsake. 
I design each one by hand so that they are truly personal.

Baby animal characters are approximately 3” tall (with exception to giraffes and really tall animals ) but can be made any size desired.

Basic designs begin at $20 US and go up from there depending on the complexity.  
Available in my SweetAntiqs  etsy shop - click here

Please email for quote for detailed orders (include a photo or sketch if possible)


Don't miss out! Subscribe to my free project tutorials, videos and tips to help you in your creative home and business life!
Enter your email address:


Delivered by FeedBurner

Monday, March 18, 2013

Polymer Clay -Springtime Bunny and Bear

Follow Me on Pinterest


I started my creative career in polymer clay and even though I work in a variety of mediums now, I love going back to my roots!

I've been asked by several recently to create more polymer clay characters .  So with spring around the corner, I sat down in my studio last week and created this Spring Bunny and Bear clay figurine.  I've always been drawn to pastel colors, actually colors in general.  These little creations are so bright, whimsical and cheerful.  They really put a sparkle in my day.

For this little sculpture I used Fimo Soft polymer clay.  I like that the has a semi-firm texture which allows me to capture details, but is not so stiff that I can't move the clay around with my clay shaper. It's a very durable clay that has a slight flex to it so it can hold up for years to come and become a little keepsale.   I don't like to use molds because I like to give each little animal their own unique personality.

I've also been brushing up on my skills because I'm determined to make and decorate a baby shower cake here really soon.  How cute would this be in fondant and gum paste?

lindapetersondesigns.blogspot.com

A little up-close look at the face


and her adorable beary cute friend...


SOLD - but feel free to custom order :)


The figurine is from my Mariah's Collection line of figurines.  One of a kind.  It measures approximately 3" tall and has as you can see lots of detail.

So if you're interested in giving this figurine a forever home....please click the buy now button and I'll send it to you :)

** UPDATE**  The bunny has found a new home!! Thank you Jenny C!

CUSTOM ORDERS TAKEN

Select Location

Thanks for looking!  Happy Spring!


Don't miss out! Subscribe to my free project tutorials, videos and tips to help you in your creative home and business life!
Enter your email address:


Delivered by FeedBurner

Tuesday, March 12, 2013

Kids Craft Idea - Make a baby chick for spring - how to and 30 other Spring Projects

Follow Me on Pinterest


This year, springtime happens to be one of my favorites, especially since the arrival of my grandbaby Carlee Jane.  Oh, I can't wait till she's old enough to play with me in the studio!

Springtime means new beginnings, the flowers blooming, trees budding and new babies. This week happens to be spring break from school, which makes it the perfect opportunity to spend some fun time making crafts together.

This is an easy kids craft project that uses air dry modeling clay and basic tools. Just follow the simple step by step instructions.
  • This project is suitable for ages 4+ with adult supervision
  • A easy and simple projects for group activities; Girl Scouts; Boy Scouts; Sleep Overs,Pre-school; youth groups and elementary education.  It is also a great party activity
  • Teaches basic shapes and proportion.
  • Substitute polymer clay for airdry clay or make from fondant or gum paste for a cake topper or cupcake decoration
  • (cost:  Approximately $2-3 per child)
Cloud Clay is available in 4oz individual colors packages as well as in value packages of 4 colors (1oz each color)


Here's the supplies you will need:


  • Cloud Clay Air Dry clay - Yellow, Orange and White
  • Wiggle Eyes
  • Kids safe markers
  • plastic egg (optional)
  • Toothpicks
  • Scissors (child safe)

Tips on how to work with Cloud Clay:
  • Since it's an air-dry clay, keep it under a moist towel while working with it. 
  • To store,wrap in plastic wrap and place into a zip-lock bag and remove the air before sealing tightly.  Keep in a cool place away from heat. 
  • Cloud clay will bind to itself while wet.  You can bond a "dry" piece to a wet piece by moistening the joints with a daub of water.  You can also join two dry pieces together in the same manner.
  • If clay becomes a little dry when working with it, add a drop or two of water and work in, it will come back to life.  You have a several hour working window to complete your project so no need to rush!


Roll a 1" ball of white clay and press around egg to create the base.  (you can also flatten the ball in your hands to create a bowl shape if you don't have an egg form)  Cut a zig-zag pattern into the top of the egg with scissors


Body:  Shape a 1 1/2" ball into a large teardrop shape and pull up on the point to form a neck


  Place the egg base onto the bottom of the body.


Wing:  Roll a 1" yellow ball into a log.  Roll the log back and forth in the center to create a little dip.


Fold the log in half at the dip and press wings to body.


Feet:  Shape a 1" orange ball into a teardrop shape.  Pinch the sides together to form the web of the feet.


Place a small log at the top.  Press each foot to body


Head:  Shape a 1 1/2" approximate yellow ball into a triangle with dull points and press in the eyes


Beak:  roll a log of orange and bend in half, pinch sides slightly 


Press the beak onto the  front of face.
You can vary the look of your chick by the size of the beak.

Add a little hat the same way you created the egg base


Shape letters from white logs of clay and color them with marker.
You can add any patterns you like to your letters.
This is where you can personalize your chick with your name or anything you wish

Make sure you sign your name on the bottom and date it.  It will become a keepsake that will last a long long time!

(It doesn't usually happen, but if some part of your chick should come apart, you can attach it back with a little water or white craft glue)

I've assembled  over 30 more projects for you to enjoy this spring! From bird cages, birdhouses, flowers, bunnies and more I'm sure you'll find something you love.


Don't miss out! Subscribe to my free project tutorials, videos and tips to help you in your creative home and business life!
Enter your email address:


Delivered by FeedBurner

Friday, March 8, 2013

Welcome baby Carlee Jane - The next generation of crafters

Follow Me on Pinterest


I hope Carlee's life doesn't fly by as fast as this past week has.

It's been a week since I was working in the studio and my son Alex called.

The conversation went something like this:

Ring Ring

Me:  "hey Al - whatcha up to?"
Alex:  "hey what are you doing?"
Me: "I'm working in the studio on a new book"
Alex:  "Well, you may want to put that book down and head to the hospital, Beth is here and we're having Carlee tonight".

Wow, tonight...tonight...TONIGHT! It just didn't register!  So I headed into the house, got Mariah, changed clothes jumped in the truck, made it all the way up to the corner and FLAT TIRE! yes, not exactly the moment you need a flat tire.  I'm still trying to comprehend the words - Carlee is coming tonight along with the fact that these are the last few moments in my life as a non-grandma and the pages are about to turn.....

Okay, so I made it back to the house, FINALLY got someone to change my tire and two hours later we were at the hospital...waiting and waiting.......

About 3:30 am she decided to arrive and here I am with Mariah and Beth's sister Ashley.  We're on the floor with our ears under the door so we can hear what's going on! And...none of us wanted to miss her first cry!


And then we heard it - 3:30 AM - Baby Carlee Jane was born 6lbs and 7oz and 19 3/4" long.  
She's named after Beth's Grandpa Carl, her Grandma Evalee and my Mom, Jane Lee
I think it's the perfect name for her and so honored that they included her grandparents in the name...makes it very special.


So proud of my daughter in law and son - they have been just amazing parents!!! Not to mention that I think Carlee is the most beautiful baby in the world!


So that closes the door on my life before grandma and now I open the door and stepped right into  to the Grandma Club.  The first time I held her in my arms - I was just speechless.....

And her grandpa Dana (Grandpa D) is pretty proud of her too!  He gets her to make the cutest faces!!!!

One things for sure, Grandma is going to have a wonderful time with Carlee as she grows up and makes Carlee Crafts!!

 I'm sure that many more exciting times are ahead...this being a grandma is fun stuff!


Don't miss out! Subscribe to my free project tutorials, videos and tips to help you in your creative home and business life!
Enter your email address:


Delivered by FeedBurner

Click on a post

Related Posts with Thumbnails